
I’m on the cusp of beginning data collection for my PhD (yay) and following a couple of pilot interviews my thoughts have turned to transcription. For many years I have transcribed audio using the free software ExpressScribe. I loved how you could tailor your favourite work flow to match your skills/needs. I usually opted for normal speed with an auto pause after a couple of seconds and then rewinding slightly so you were sure you had picked it all up. The functionality of having a foot peddle but within software for digital files, such as mp3 or mp4. Being able to touch type was a further bonus and something that I rejoice having put time into many years ago. Despite these tools and skills it still took what felt like forever to work through hours of audio. In other instances I have autogenerated machine auto-captions which are then easily corrected (depending on the speaker of course) and opened as a .txt file, however, the text is then split by time codes and would have to be undone for research purposes.
For my PhD interviews I don’t have access to auto-captions without involving a further system so for ethical reasons I don’t want to do this. I also know there are reasons other than technical to do the transcribing of my interviews/focus groups by hand, on my own. However, as someone tied to their computer all year and physically sore from using the mouse and keyboard I want to explore a compromise; balancing the best of both words. This then is a review of my experiments with the Dictate function in Microsoft Word (Office 365) combined with any media player. Note I haven’t explored other platforms as I will be using institutional Microsoft Office 365 tools throughout the process of my PhD.
Step by step guide
- Open a new Word document and save it in OneDrive to ensure autosave is on
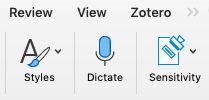
- Click on the Dictate button on the ribbon on the home tab, see figure 1.
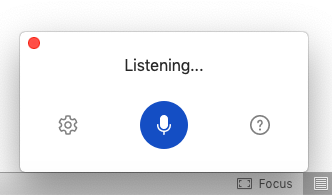
- This will display the following new window on your document, figure 2, which you can drag to sit where you want it to (just click and hold down while you move it).
- The first time you use this you may want to change the settings for your needs. Click on the cog icon to the left of the microphone button. However, once you have clicked on the Dictate button it starts to listen for audio immediately so press the blue microphone button to pause it while you change the settings.
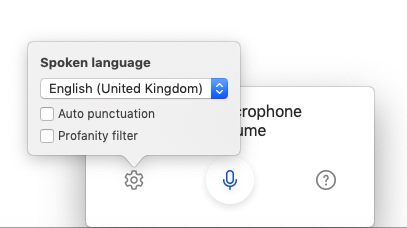
- Note: Auto punctuation is OFF by default and the Profanity filter is ON by default.
- Open your audio file in a player, I used QuickTime so there were no speed controls for the play function.
- Press Play
- Quickly return to Word and press the microphone icon again to re-activate if you had changed settings or just the Dictate button if you are going with the defaults.
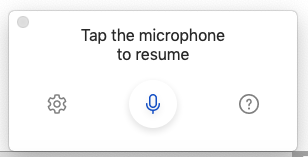
- Then sit back and be a-m-a-z-e-d watching the words appear before your eyes, but don’t nod off or wander to the kitchen for a coffee as occasionally the microphone gets a bit tired and turns off so you need to be ready to press the resume button, figure 4. There is an audible notification when this happens so you shouldn’t miss it.
Reflections
For my first two experiments I had audio files of approximately 40 minutes in length and I generated 4400 words in one and 5400 words in the other at normal speaking speed. At a wild guess having watched the words appear before my eyes whilst listening to the audio it was about 70% accurate. I’m sure this will vary greatly between speakers. In one it seemed to struggle a bit with speed and every now and then I visually watched it pause, get lost and then pick up again when it seemed to grasp what was being said again. In the other one it seemed to prefer the speaking speed with much fewer gaps.
With regards to the Auto punctuation, again I tried one with it off and one with it on. However, I turned to Chapter 7 of Braun and Clarke’s Successful Qualitative Research, and realised that the one without punctuation made more sense than the version with punctuation added:
When we speak, we don’t use punctuation to make ourselves understood. We use pauses and intonation; we vary our speech in pace (faster, slower), volume (louder, quieter) and many other ways. (page 162)
The chapter as a whole is really helpful to understand what a transcript is and isn’t when it comes to research and I will be drawing on their guide to notation when it comes to the real interviews. This means that the following is the approximate number of cycles of listening to the audio which would be required for me to get a complete version:
- Create the first draft
- Break each speaker onto a new line, do minor insertions and corrections
- Complete the missing words/phrases
- Add notations for pauses, laughing, over talking etc. Depending on the interview this cycle may take more than one listen
- The final cycle may be done without listening, and involves adding the initial of the speaker and colon at the start of each separate bit of speech.
This is an approximation of 200 minutes of listening with about 30-60 of pausing giving a total of 4-4.5 hours for 40 minute interview. This in comparison with Braun and Clarke’s estimate of at least 8 hours / hour interview (page 170) – emphasis theirs. So I hope overall there is some time to be saved without losing that all important connection to the data. I am also hoping that I will speed up once I get the hang of the notations better.
In summary, the pros outweigh the cons and I think this is a compromise I can work with.
Pros
- Just about keeps up with natural speaking speeds
- Doesn’t remove repeated words (which most auto-captioning software does)
- Autocorrects as it types
- Capitalises proper nouns
Cons
- Does not type ums, ams, ah etc
- Microphone can randomly turn off so you need to stay alert
Reference
Braun, V. and Clarke, V., 2014. Successful qualitative research. London: SAGE.
Header image attribution: Photo by Damian Zaleski on Unsplash
Clare, thanks a million for sharing your tips. I am planning to use the Dictate feature to record and transcribe a telephone interview with a pilot who uses a traditional phone. I plan to have the pilot on speaker, with my phone placed close to my laptop. I have tried it out briefly and Word picks up both speakers and I’ll be keeping an eye on the record button as you advise. To be on the safe side I may also record using the voice memo app on my iPhone and store to OneDrive. Honestly, researchers who can record interviews using Teams don’t know how fortunate they are 😉
Hope all is well.
S.
So sorry for the delay in replying Sandra, I haven’t logged in here since the beginning of summer. I still love Dictation and have been experimenting further with verbal commands such as ‘new paragraph’, ‘comma’, ‘full stop’, ‘delete x’ (with x being the word[s] before the command delete). I hope you have been getting on well navigating the hurdles as you begin your interviews. It would be great to catch up soon to hear about all things research. Take lots of care.